

7 Steps to Hang a Climbing Board in a Doorway Safely
Last Updated: November 3, 2026
Quick Summary
To hang a climbing board in a doorway safely, fix it to solid structural framing, never to plasterboard alone. Measure your doorway and check what sits behind the plaster first, then mount the board on an 18 mm plywood backer board spanning at least two studs, or use a drill-free doorframe mount if you rent.
- Tap the wall above the door: a hollow, drum-like sound usually means plasterboard over a cavity.
- Cut 18 mm plywood to span at least two studs, wider than the board, and fix it with coach screws into the timber.
- A wedge-style pull-up bar locks against the doorframe with adjustable width and must not rotate or slide.
- Include any added weights in the product's stated weight capacity total.
- Start with short hangs on the biggest edges with feet on the floor in week one.
Table of Contents
- Check Your Doorway Before You Hang a Climbing Board
- How to Build a Hangboard Backer Board That Spreads the Load
- Drill-Free Doorway Mounts: No-Nail and Removable Options
- Climbing Hangboard Installation Safety: Load Ratings and Checks
- Hangboard Training for Beginners: Your First Four Weeks
- Pick Your Doorway Setup and Start Training
- Frequently Asked Questions
Check Your Doorway Before You Hang a Climbing Board
The safest way to hang a climbing board in a doorway is to fix it to solid structural framing, never to plasterboard alone. Before you buy anything, measure your doorway and work out what sits behind the plaster.
A climbing board is a wooden training panel with shaped edges and pockets that lets you build finger strength by hanging from it. Where you mount it decides whether it holds.
Measure the opening and clearance
Start with a tape measure and note these dimensions:
- Frame width: the inside face-to-face width of the door opening, measure yours rather than assuming.
- Trim depth: how far the architrave projects from the wall, since a clamp-style bar needs a flat, consistent surface to grip.
- Headroom above the frame: the clear wall height from the top of the trim to the ceiling. You need enough room for the board plus your hands and a full hang.
- Floor clearance: the distance from the bottom of the board to the floor when your feet are extended. If your feet touch the floor at full stretch, you cannot hang freely.
- Wall thickness and surface: note whether the wall is plasterboard, masonry, or timber-lined, and whether the trim is timber or MDF.
Work out what is behind the plaster
Tap the wall above the door with your knuckles. A hollow, drum-like sound usually means plasterboard over a cavity; a dull thud suggests solid backing or masonry. A stud finder will help you locate timber studs, but confirm the readings by drilling a small pilot hole in a hidden spot if you are unsure.
Look for these stop conditions before you drill:
- No studs where you need them: if the stud finder shows only cavity behind the mounting area, a permanent board cannot be safely fixed there without a different approach.
- Crumbling or cracked trim: movement or cracks in the door trim suggest the frame is loose or damaged.
- Hollow-sounding wall with no accessible framing: plasterboard alone will not hold a loaded board.
- Rental property or uncertain structure: if you cannot confirm the framing or you do not have permission to drill, stop and consider a removable option instead.
Doorway compatibility matters most. A frame that flexes or a wall with no studs behind it will not take a loaded board. If you rent, note that a permanent mount means drilling, so a removable option may suit you better.
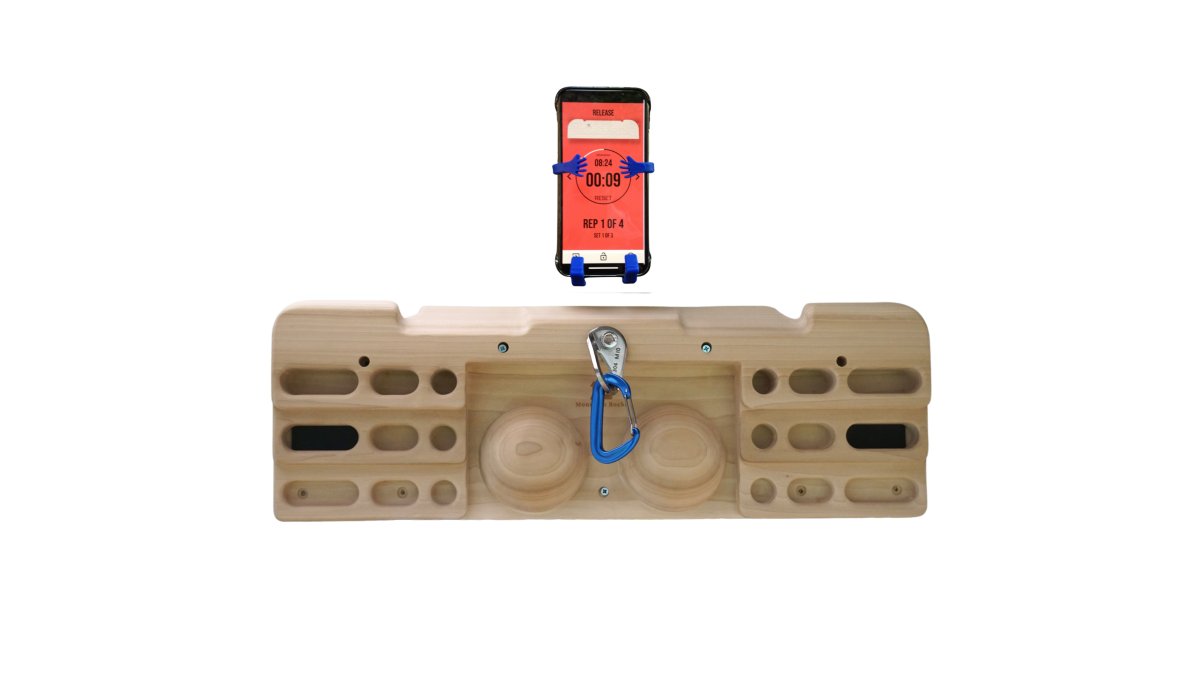
For a doorframe-specific board, see the Mountain Rocks Wooden Doorframe Hangboard Wildwood 2003.

How to Build a Hangboard Backer Board That Spreads the Load
A backer board is a plywood panel fixed across two or more studs, and the hangboard screws into that panel.
Use these steps:
- Cut 18 mm plywood to span at least two studs, wider than the board
- Mark the stud centres on the panel
- Fix the panel with coach screws into the timber, not the plaster
- Check the panel sits flush and level
- Seal the edges if the doorway is damp
Drill-Free Doorway Mounts: No-Nail and Removable Options
Drill-free mounts use a doorway pull-up bar to carry the hangboard, so nothing is fixed to the wall. But not all removable setups work the same way, and the installation steps differ by mount type.
Permanent backing-board installation (for comparison)
If you own the property and have confirmed timber studs, a permanent mount is the most solid option. Cut an 18 mm plywood backer board to span at least two studs, wider than the hangboard. Mark the stud centres on the panel, fix it with coach screws into the timber (not the plaster), check it sits flush and level, and then screw the hangboard into the backer. This is the method most guides describe, and it is the one to use when you can drill.
Pull-up-bar setup
A wedge-style pull-up bar locks against the doorframe with adjustable width. To fit one:
- Check the bar's stated width range against your measured frame width.
- Clean the trim surfaces where the bar will contact.
- Extend the bar until it sits firmly against both sides of the frame, following the manufacturer's tensioning instructions.
- Confirm the bar cannot rotate or slide by pushing and pulling it before adding any load.
- Attach the hangboard to the bar using the supplied brackets or bolts, and check that the board sits level.
Purpose-built removable mount
Some removable mounts are designed specifically for hangboards rather than adapted from a pull-up bar. Follow the manufacturer's sequence: fit the frame brackets, tension them, mount the board plate, then attach the hangboard. Check that the board is square and that no part of the mount contacts the plasterboard rather than the frame.
Mountain Rocks Portable Pull-Up & No Nail Hangboard Training Bundle | Wildwood →
Two things decide whether any drill-free option works:
- The bar or bracket must fit your frame width and lock firmly
- The frame must be structurally sound and free of cracks
For a complete no-drill station, the Wildwood 2100 wooden hangboard with pull-up bar pairs a beechwood board with an adjustable doorframe bar and a 150 kg maximum load. If you already own a board, the Quick-Mount adjustable doorframe pull-up bar gives you the removable mount on its own.


| Mount type | Drilling | Best for | Main limit |
|---|---|---|---|
| Permanent wall mount | Yes | Own home, heavy use | Needs studs and a backer |
| No-nail doorframe bar | No | Rentals, apartments | Depends on frame strength |
| Portable bundle | No | Travel and warm-ups | Fits suitable doorways only |
Climbing Hangboard Installation Safety: Load Ratings and Checks
Climbing hangboard installation safety comes down to three things: a sound frame, correct hardware and a load you stay under. Every product has a weight capacity, and you must include any added weights in that total.
Run this checklist after fitting:
- All screws tight, with no movement when you push the board
- Board level and square to the frame
- Bar locked and unable to rotate
- First hang done with feet lightly touching the floor
- Full body weight tested gradually over a week
Hangboard Training for Beginners: Your First Four Weeks
Hangboard training for beginners should start easy and build slowly. For a fuller guide on when and how to begin training safely, see When to Start Training for Climbing.
A simple first month:
- Week 1: Short hangs on the biggest edges, feet on the floor
- Week 2: Add a few seconds per hang
- Week 3: Use smaller edges or add light resistance
- Week 4: Rest more, then test a slightly harder grip
Stop if fingers feel sharp pain.
Pick Your Doorway Setup and Start Training
Choose a permanent mount if you own the home and train hard. Choose a no-drill doorway mount if you rent, travel or have a small space.
Our pick for many people is the Wildwood Go and steel pull-up bar bundle: no drilling and portable.
Frequently Asked Questions
Can you mount a climbing board directly onto a door frame?
Only if the frame is solid timber and firmly fixed into the surrounding wall. Most door frames are thin decorative trim with a small gap behind them, so screwing straight into the trim can pull it loose under load. Check the frame's thickness and how it is fixed before drilling. A safer route is a no-nail doorway system such as the Wildwood 2100, which hangs the board from an adjustable pull-up bar and removes when you are done.
Do I need a backer board to install a hangboard?
A backer board is worth adding whenever you drill into a wall. For a rental or a doorway you cannot modify, a no-drill bar-mounted setup skips the backer board entirely.
Is it safe to mount a hangboard on plasterboard?
Plasterboard alone is not a suitable fixing point for a hangboard. Fix to solid structural framing, or use a doorway bar that transfers force into the frame. If you cannot locate solid timber, do not hang from that wall.
How much clearance do I need above a door for a hangboard?
Allow enough room between the top of the board and the ceiling for your head and bent arms during a hang, and check that your feet clear the floor at full stretch. Also check that the door still opens fully and that the board does not sit where a passing shoulder will clip it.
Hanging a board safely starts with the right checks and the right gear. MOUNTAIN ROCKS builds purpose-made wooden hangboards and doorway training bundles, with fast dispatch and free shipping. Get started with MOUNTAIN ROCKS and turn any suitable doorway into a strength station.
