

Rock Climbing Pull Up Bar: Choosing the Right Setup
Last Updated: October 29, 2026
Quick Summary
The best pull up bar for rock climbing depends on your goals. A pull-up bar builds pulling power, while a hangboard trains finger strength, and most climbers benefit from both. Measure your doorframe before buying any bar.
- Measure the clear width and depth of your doorframe before buying any bar.
- Choose a load rating well above your bodyweight, since the lower rating governs when combined with a hangboard.
- Test a new bar with bodyweight close to the floor before adding any extra load.
- Start with dead hangs of 10 to 20 seconds, resting a minute between sets.
- Build finger load gradually, because tendons adapt more slowly than the back and arms.
Table of Contents
- Hangboard vs Pull-Up Bar: Which Trains What Climbers Need
- How to Choose a Climbing Pull-Up Bar: Selection Criteria
- Mountain Rocks Pull-Up and Hangboard Options Compared
- Climbing Pull-Up Bar Exercises and Progression for Beginners
- Doorframe Compatibility, Mounting and Injury Prevention
- Using a Hangboard on a Pull-Up Bar: Setup and Warm-Up Routine
- Choosing Your Home Setup Before Your Next Session
- Frequently Asked Questions
Choosing between a hangboard and a pull-up bar sounds simple, but the two tools train different things, and picking the right pull up bar for your goals matters. This guide compares them on what actually matters for climbing: finger strength, grip endurance, and pulling power. The short answer is that a hangboard builds the fingers and a pull-up bar builds the pulling muscles, and most climbers eventually benefit from having both.
Hangboard vs Pull-Up Bar: Which Trains What Climbers Need
A hangboard is a fingerboard with edges and pockets of set depths, used for hangs that load the fingertips directly. For a practical overview of choosing one, see the beginner hangboard buying guide.
The distinction matters because finger tendons and the forearm muscles adapt more slowly than the big muscles of the back. Loading the fingers gradually, with controlled hangs, is the reason hangboard training is usually done in short, measured sessions rather than long grinds.
How to Choose a Climbing Pull-Up Bar: Selection Criteria
Most buying guides list features. A climber needs a decision order, because the wrong first choice locks out every later one. Work through these five criteria in sequence, each one constrains the next.
1. Doorframe geometry comes first
Measure three things before anything else: the clear width between the frame's inner faces, the depth of the frame (wall thickness plus trim), and whether the frame is solid timber or a hollow metal stud partition. A bar that clamps the frame needs enough flat, load-bearing surface on both sides; a bar that presses against the vertical jambs needs a frame that will not flex.
- Width: Confirm the bar's stated maximum and minimum width against your measured clear width. The Quick-Mount Adjustable Doorframe Pull-Up Bar uses an adjustable width-lock design; check its listed width range against your doorframe.
- Depth: A deep frame changes where the bar sits relative to the wall, which affects clearance for your head and for a hangboard mounted above. The Portable Steel Pull-Up Bar in our Wildwood Go bundle is rated for doorframes up to 18.5 cm deep.
- Frame condition: Hollow, cracked, or poorly fixed frames can shift under load even when the bar fits on paper. Check the frame before every session, not just at installation.
2. Load rating and what it actually covers
A load rating is a ceiling, not a target. Choose a bar rated well above your bodyweight so that dynamic movement, added weight, and the pull of a hangboard do not push you near the limit. The Portable Steel Pull-Up Bar supports users up to 200 kg; the Wildwood 2100 Wooden Hangboard with Pull-Up Bar lists a maximum load of 150 kg.

3. Installation method and your tenancy
Drilling versus no-drilling is the criterion that decides most rentals. Several of our bars install without screws, which suits rental homes and shared walls. A no-drill bar relies on clamping force and friction, so frame condition matters more, not less. If you own the property and can drill, a fixed bar removes the fit uncertainty entirely.
4. Grip options and hangboard compatibility
For pull-ups alone, foam-covered handles are comfortable and kind to the skin. For climbing-specific work you want a bar that either accepts a hangboard above it or pairs with a separate finger-training tool. Decide now whether you want finger-edge loading, because a bar without a hangboard mounting path cannot add it later without a second purchase.
5. Portability and storage
If you train in more than one place, weight and packability matter. A removable doorframe bar that packs down is the difference between training on a trip and skipping it.
Quick decision guide
- Renting, limited space, pull-ups only: a no-drill adjustable doorframe bar with a load rating well above bodyweight.
- Finger strength is the goal: a hangboard setup, or a bar plus a board rated for the combined load.
- Both tools, one purchase, portable: a bundle that pairs a beechwood board with a removable steel bar.
Safe design and use of home climbing training equipment
Mountain Rocks Pull-Up and Hangboard Options Compared
We stock four setups that cover most home training needs. Each suits a slightly different climber.
Pull-Up Bar and Grip Trainer Options
The Mountain Rocks Quick-Mount Adjustable Doorframe Pull-Up Bar is a pull-up option at AUD $99.00. It uses an adjustable width-lock design with foam grips and installs without screws or drilling. The Portable Climbing Grip Training Kit, at AUD $149.99, adds two portable pull-up bars and 9 cm steel grip balls, so you can train sloper-style grip as well as pulling power.
Best for: climbers who want pull-up and grip work with no hangboard. Skip if: you need finger-edge loading, since none of these grips replicate a hangboard edge.
Mountain Rocks Portable Pull-Up & No Nail Hangboard Training Bundle | Wildwood →
Hangboard Setups and Pricing in AUD
The Wildwood 2100 Wooden Hangboard with Pull-Up Bar, at AUD $209.99, combines a beechwood hangboard with a removable doorframe bar. The Portable Pull-Up and Hangboard Training Bundle, at AUD $129.95, pairs the Wildwood Go beechwood hangboards with the steel pull-up bar, so you get both tools together.

Best for: climbers who want finger-edge training at home with a removable setup. Skip if: you only need pulling work, since the bundle costs more than a bar on its own.
The four setups below cover most home training needs, each suited to a slightly different climber.
| Product | Price (AUD) | Best for |
|---|---|---|
| Quick-Mount Adjustable Doorframe Pull-Up Bar | $99.00 | Pull-ups, no hangboard |
| Portable Climbing Grip Training Kit | $149.99 | Pull-ups and grip training |
| Wildwood 2100 Wooden Hangboard with Pull-Up Bar | $209.99 | Finger-edge training, 150 kg max load |
| Portable Pull-Up and Hangboard Training Bundle | $129.95 | Hangboard and pull-up bar together |
Climbing Pull-Up Bar Exercises and Progression for Beginners
Start with controlled movements rather than kipping or swinging. To see where your grip stands against common benchmarks, read the grip strength benchmarks. A simple progression looks like this:
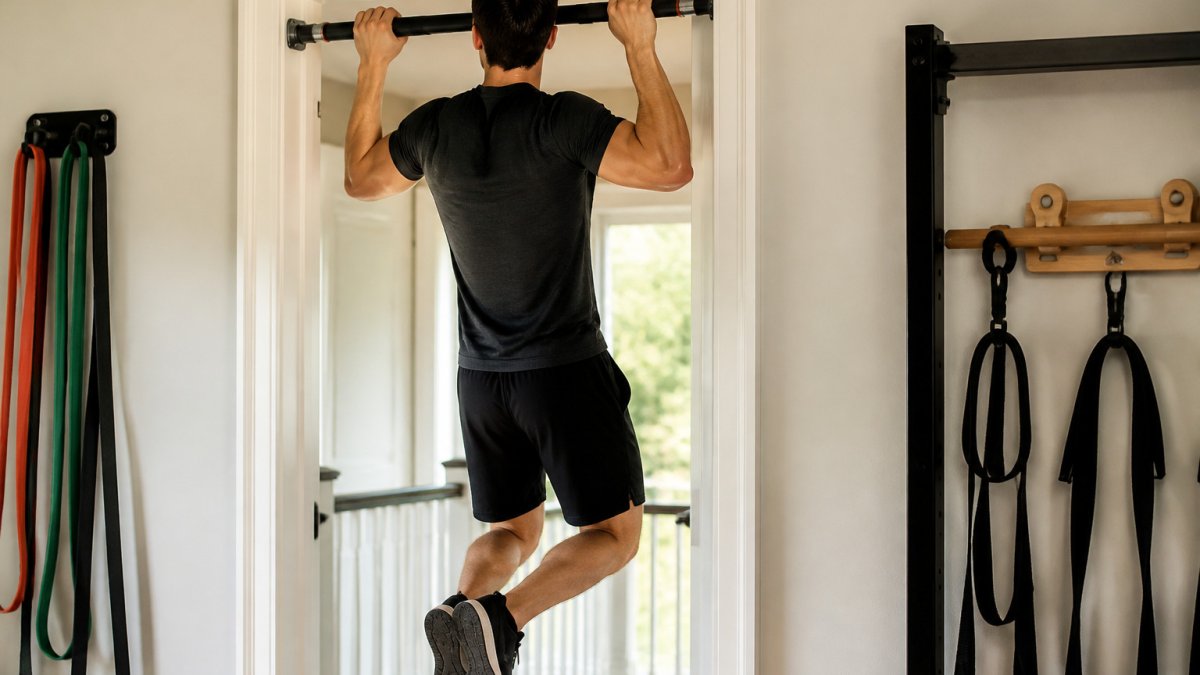
- Dead hangs: Hang from the bar with straight arms for 10 to 20 seconds, then rest for a minute. Repeat for three to four sets.
- Assisted pull-ups: Use a resistance band or lower yourself slowly from the top, taking about three seconds on the way down.
- Full pull-ups: Once you can complete three to five clean pull-ups, add sets gradually.
- Grip work: Add piston grips or grip balls to build crush strength once dead hangs feel comfortable.
Build up volume slowly. Finger tendons adapt more slowly than muscle, so a sudden jump in hang time or edge depth is a common way to get injured.
Doorframe Compatibility, Mounting and Injury Prevention
This is the section most guides skip, and it is where home setups fail. Compatibility, mounting, and finger loading are one continuous chain: a bar that fits badly loads the frame unevenly, and a frame that shifts turns a controlled hang into a dynamic one. Treat the checks below as a pre-session routine, not a one-off installation step.
Compatibility checks before you buy
- Measure the clear width between the inner faces of the doorframe and compare it with the bar's stated range. Our bars are rated for doorframes up to 18.5 cm wide.
- Measure the frame depth and compare it with the bar's depth rating. The Portable Steel Pull-Up Bar in our Wildwood Go bundle is rated for doorframes up to 18.5 cm deep.
- Check the frame material and fixing. Solid timber frames clamp predictably. Hollow metal stud partitions and loose trim can flex or crush; if you are unsure, do not load the bar.
- Check head and board clearance. If you plan to mount a hangboard above the bar, confirm there is room for the board and for your hands without hitting the ceiling or the top of the frame.
Mounting and load limits
- No-drill bars rely on clamping force and friction. They are convenient for renters but demand a solid, flat frame and a re-check before every session.
- Combined loads: when a hangboard hangs from a bar, both ratings apply and the lower one governs. The Wildwood 2100 Wooden Hangboard with Pull-Up Bar is rated for a maximum load of 150 kg; the Portable Steel Pull-Up Bar supports users up to 200 kg. Do not assume the higher figure protects the lower-rated component.
- Test low and slow: install the bar, hang with bodyweight only close to the floor, and check for movement before adding a board or any extra load.
Finger-loading guidance for beginners
Finger tendons and the forearm muscles adapt more slowly than the back and arms, which is why finger-intensive training is usually dosed in short, measured sessions.
- Warm up first: easy hangs on the largest edges and light pulls before any target grip. Never load cold fingers.
- Progress one variable at a time: increase hang time or reduce edge depth, not both in the same week.
- Stop on sharp pain: a finger joint that feels sharp rather than tired is a signal to end the set, not to push through.
Who should choose which setup
- Renters and small spaces: a no-drill adjustable doorframe bar, checked against width and depth ratings.
- Climbers prioritising finger strength: a hangboard setup rated for the combined load.
- Travellers: a portable bar and packable board, with the same compatibility checks repeated at each location.
Using a Hangboard on a Pull-Up Bar: Setup and Warm-Up Routine
The Wildwood 2100 and the Portable Pull-Up and Hangboard Training Bundle both let you hang a beechwood board from a removable doorframe bar.
Then move to your target grips. A common approach for beginners is two sets of 10-second hangs on the 25 mm pocket, resting two minutes between sets.
Best for: climbers who want to combine finger and pulling work in one compact setup. Skip if: you have a sore finger pulley, in which case stop hangboard work and see a physiotherapist or doctor first.
Choosing Your Home Setup Before Your Next Session
If you climb mainly on overhangs or need pulling power, start with the Quick-Mount Adjustable Doorframe Pull-Up Bar at AUD $99.00. If finger strength is the priority, the Wildwood 2100 at AUD $209.99 gives you a dedicated hangboard. If you want both in one purchase and you need a portable setup, the Portable Pull-Up and Hangboard Training Bundle at AUD $129.95 is the strongest value.
Whichever you choose, check doorframe fit first, build load slowly, and keep sessions short enough that your fingers recover between them.
Frequently Asked Questions
Can you use a pull-up bar for rock climbing training?
Yes. A pull-up bar builds the pulling strength, lat and shoulder stability that climbing demands, and it is useful for dead hangs, pull-ups and lock-off work. It does not train finger strength on small edges the way a hangboard does, so most climbers use both. A doorframe bar such as the Mountain Rocks Quick-Mount Adjustable Doorframe Pull-Up Bar at $99.00 AUD suits upper-body work, while a hangboard covers the fingers. Check your doorframe width first, as compatibility varies.
Can you attach a hangboard to a pull-up bar?
Some setups allow it. The Wildwood 2100 Wooden Hangboard with Pull-Up Bar at $209.99 AUD is designed to attach to its included adjustable bar without nails or wall mounting, so you can remove it after each session. Always check the doorframe dimensions and follow the installation instructions, and keep the total load, including any added weight, within the stated 150 kg maximum.
What should you look for in a pull-up bar for climbing training?
Look at the maximum user weight, the doorframe width range, whether installation requires drilling, and the grip type. Steel bars with foam-covered grips are durable and comfortable. Portability matters if you travel or rent. Grip accessories, such as the Mountain Rocks Steel Pull Up Piston Grips at $49.99 AUD, add forearm and crush-grip work that a plain bar does not provide.
