

Can You Mount a Hangboard Without Drilling?
Last Updated: November 5, 2026
Quick Summary
You can mount a hangboard without drilling by using a doorframe pull-up bar with the board attached, or a portable hangboard hung from a rope sling. Both carry the load through the doorframe or anchor, so nothing touches your walls and no landlord permission is needed.
- A doorframe bar wedges between the side jambs and relies on friction plus your body weight.
- The Wildwood 2100 weighs under 2 kg and is rated to 150 kg total load.
- Tap the jamb with a knuckle: a dull thud suggests hollow, a sharp tap suggests solid.
- Most adjustable bars cover roughly 60-100 cm, so aim to sit mid-range.
- Start with feet-assisted hangs on a 20 mm edge or larger before progressing.
Table of Contents
- Why a No-Drill Hangboard Setup Works
- Your Hangboard Doorway Mount Options
- When to Choose a Freestanding Hangboard Frame
- Hangboard Mounting Safety: Checks Before You Hang
- Step-by-Step: Setting Up Your No-Drill Hangboard
- Pick Your No-Drill Setup and Start Training
- Frequently Asked Questions
Why a No-Drill Hangboard Setup Works
You can mount a hangboard without drilling, and for most renters it is the smartest option.
A doorframe bar wedges against the frame and uses your body weight to stay put.
There is one catch: a no-drill hangboard is only as safe as the doorframe it hangs from. We cover those checks below.
If you want the deeper reasoning first, our guide on hanging a board in a small apartment without damage walks through the same trade-offs.
Your Hangboard Doorway Mount Options
Two no-drill methods cover almost every home. The right pick depends on your space, budget, and how often you train.
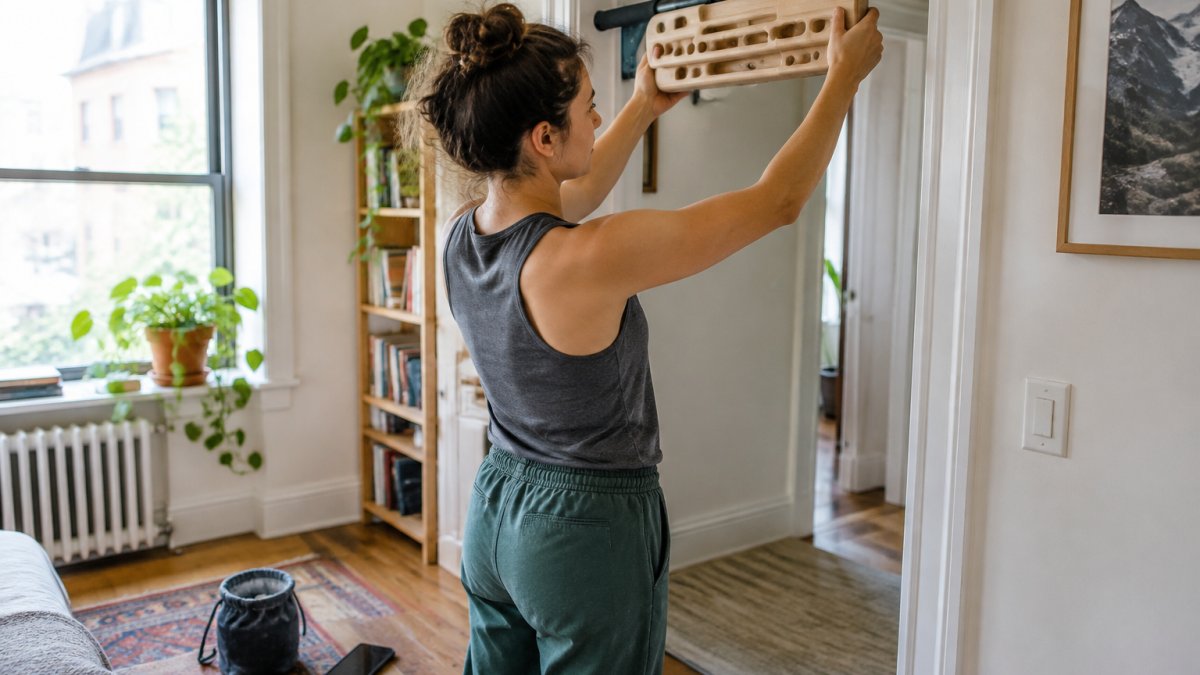
Doorframe pull-up bar with a hangboard attached
This is the most stable no-drill option. An adjustable steel bar locks into the doorframe using a width-lock design.
Our Wildwood 2100 wooden hangboard with pull-up bar is built for this.

If you already own a bar, the Quick-Mount adjustable doorframe pull-up bar pairs with a hangboard and installs without screws.

Best for: Renters with a solid doorframe who want a fixed-feeling setup they can remove in minutes. Skip if: Your doorframe is hollow, damaged, or an unusual width.
Portable hangboards and rope sling setups
A portable hangboard hangs from a rope looped over a bar, tree branch, or sturdy beam. It packs flat and travels with you.
The Wildwood Go portable hangboard set includes two beechwood boards and two ropes. Four edge depths, 25 mm through 10 mm, let you progress as your fingers get stronger. Independent hand positioning also keeps your shoulders in a more natural line.

Best for: Travellers, gym-goers, and anyone who wants a warm-up tool in a bag. Skip if: You need maximum load capacity for weighted hangs.
Here are the two no-drill methods that cover almost every home, and who each one suits.
| Option | Best for | Skip if |
|---|---|---|
| Doorframe pull-up bar with hangboard attached | Renters with a solid doorframe wanting a fixed-feeling setup | Doorframe is hollow, damaged, or an unusual width |
| Portable hangboard and rope sling setup | Travellers, gym-goers, and anyone wanting a warm-up tool in a bag | You need maximum load capacity for weighted hangs |
| Freestanding hangboard frame | Garage gyms, wide or glass-panelled doorways, shared houses | You are short on floor space or budget |
When to Choose a Freestanding Hangboard Frame
A freestanding hangboard frame is the answer when no doorframe will take the load. These units stand on their own base and need no fixing at all.
They suit garage gyms, rooms with wide or glass-panelled doorways, and shared houses where nobody wants to risk a frame. The trade-off is floor space and cost.
For most small apartments, a doorway bar still wins. Reach for a freestanding frame only when your doorways fail the safety checks below.
Mountain Rocks Portable Pull-Up & No Nail Hangboard Training Bundle | Wildwood →
Hangboard Mounting Safety: Checks Before You Hang
Hangboard mounting safety starts before you hang a single finger, and it is mostly about where the load goes.
Run these checks every time you set up, and treat any failure as a stop sign.
- Identify the frame material. Solid timber or masonry jambs are suitable. Hollow-core, MDF-faced, or drywall-return jambs are not. Tap the jamb with a knuckle: a dull thud suggests hollow, a sharp tap suggests solid.
- Check for cracks and movement. Look for splits along the jamb, gaps at the mitres, and any flex when you push the frame sideways with moderate force. A frame that moves under hand pressure will move more under body weight.
- Measure the doorway width against the bar's stated range. Most adjustable bars cover roughly 60-100 cm, but the rating is specific to the model. A bar extended near its maximum is less stable than one centred in its range.
- Inspect the locking mechanism. Look for bent pins, worn threads, or a width-lock that does not click positively. Replace worn parts rather than tightening past the stop.
- Confirm the load rating. Check the board and bar ratings separately, then use the lower of the two. Our Wildwood 2100 is rated to 150 kg total load including added weights; if you add a weight belt, that counts toward the ceiling.
- Test with feet on the floor first. Load the bar progressively, hands only, then feet-assisted hangs, then a full hang, before attaching the board and pulling hard.
- Check the floor and surrounding space. Clear at least a body-length of floor and keep the doorway free of trip hazards, because a slip on a bar is worse than a slip on a board.
Two failure modes are worth naming. Bar slip usually happens when the bar is extended too far, the jamb is smooth or painted, or the locking mechanism is worn; the fix is a correctly sized bar, not extra tightening. Frame damage shows up as splitting at the jamb or a head jamb that drops slightly; if you see either, stop using that doorway entirely and have the frame inspected.
Readiness is not only about the doorway.
If finger pain appears during or after a session, stop that session, rest the finger, and avoid loading it until it is pain-free in daily use.
Step-by-Step: Setting Up Your No-Drill Hangboard
Here is the full process.
- Pick your doorway. Choose a solid frame in a spot with clear floor space and enough headroom to hang without your feet touching the floor when you are ready for full hangs. Avoid doorways on stairs or with a raised threshold.
- Measure the width. Compare it to your bar's adjustable range and aim to sit mid-range rather than at the limit. Note the height of the head jamb too, because the bar needs a flat surface to seat against.
- Fit the pull-up bar. Extend the width-lock until it sits snug against both side jambs, then check that the bar is level and that the locking pins or threads are fully engaged. The bar should not rotate when you push one end up and the other down.
- Test the bar. Hang with feet lightly touching the floor first, then take a full hang with feet clear. Listen for creaks and watch for any movement at the jamb.
- Attach the hangboard. Fix it to the bar using the supplied fittings and check that the board sits centred, with the edges level and the bolts or straps tight. A board that rocks on the bar will load your fingers unevenly.
- Check every connection. Nothing should shift when you pull down firmly on each edge in turn. Re-check the bar's width-lock after the first session, because seating can settle.
- Start easy. Begin with feet-assisted hangs on a 20 mm edge or larger, using an open-hand grip before a half-crimp, and keep sessions short.
For a more detailed walkthrough, our seven-step guide to hanging a climbing board in a doorway safely covers each stage with extra checks.
The ACCC product safety guidance on exercise equipment is worth a read if you are buying a bar online for the first time.
Once the setup is sound, the training plan matters more than the hardware.
Balance finger training with climbing rather than stacking it on top.
Pick Your No-Drill Setup and Start Training
Two paths, one decision. If you have a sound doorframe, the bar-and-board combo gives you the most training options for the least fuss. If you move around a lot, the portable sling set earns its place in your bag.
A common mistake is buying the smallest edge first. Start at 20 mm or above, build hang time, then work down as your finger strength grows.
At MOUNTAIN ROCKS, our no-drill gear is built for exactly this: durable beechwood boards, adjustable steel bars, and bundles that save you money.
Get started with MOUNTAIN ROCKS and turn any sound doorway into a finger-strength station, no drill required.
Frequently Asked Questions
Can you mount a hangboard without drilling?
Yes. The two common routes are a doorframe pull-up bar that carries the hangboard, or a freestanding frame that stands on the floor. Both avoid screws and wall damage, which suits renters and small apartments. The trade-off is a load limit: check the stated maximum for your bar or frame and keep the total weight, including any added training weight, within it. Always test the setup with bodyweight only before adding load.
Are doorway pull-up bars safe for hangboards?
They can be, provided the bar is rated for the load and fitted correctly to a compatible doorframe. Check the doorway dimensions against the product specifications, make sure the width-lock mechanism is snug, and confirm the frame is structurally sound. Never exceed the stated maximum load. A bar rated to 150 kg or more gives useful headroom for hangboard work, but the doorframe itself must be able to take the force.
Can a tension-mounted hangboard damage a door frame?
It can if the frame is weak, the bar is the wrong size, or the load exceeds the rating. Tension mounts press against the frame, so soft timber, loose architraves or damaged frames are poor candidates. Inspect the doorway first, follow the installation instructions, and remove the setup between sessions. If you are unsure about the frame's condition, a freestanding hangboard frame avoids putting force through the doorway entirely.
How much weight can a no-drill hangboard mount hold?
It depends on the product. The Wildwood 2100 no-nail setup is rated to 150 kg total supported load, including any added training weights, while the steel pull-up bar in the Wildwood Go bundle supports users up to 200 kg. Treat those as ceilings, not targets. Stay well under the limit, check all components are correctly assembled, and stop immediately if anything shifts or creaks during a hang.
